Bicycles, at least in their current recognizable form, have been around for two centuries. And bicycle-specific lighting for about half that time. Obviously today the bicycling lighting technology is a far cry, even a distant universe from early attempts, but the same challenges and controversies still exist today.
A Candle in the Wind
Initially, bicycle lighting just engaged other lighting options of the era including candles, mining lamps, and even electric incandescent bulbs as early as 1900. There were serious problems and significant dangers with all of them, so much so that the breathtaking dimness of the output barely made the list of concerns. But enough of the history lesson. Let’s jump to the present.
Bicycle-specific lighting has evolved as fast as bicycles recently, and if you imagine it, well, it probably already exists. The massive power being packed into rechargeable batteries combined to the near-immortality of LED lights and then stuffed into advanced polymer containers with multifunction switches, the modern bike light is pretty much a car headlight. And that is an important comparison because understanding the lighting needs for bike riding at night contains both minimums and maximums. More is not always better, but less can be flat-out dangerous.
Let’s break this topic of bike lights into three categories with which we can then compare needs with available tools. First is light output, second is power source, and third is overall options or features. Light output is the single most important consideration simply because it is the core reason for the light in the first place. Light output has several aspects important for bike riders including beam reach, beam spread, and the overlap of the two. Beam reach is how far ahead the beam can usefully light something in front of you. Beam spread is how wide a field of view the beam illuminates to the sides of the beam reach. And the way the two blend dictates your awareness and visual speed while you ride.
Wide or Deep?
For me, I imagine the relationship between beam reach and spread to be some sort of triangle of light. A high reach-low spread light (think spotlight) is a triangle with a narrow base and large height. A floodlight type light would be a wide base and a low height. In the first case, the long reach would give you a heads up as to what’s in the distance, but at the expense of what’s right in front and around you. The latter option brightens up the immediate area leaving the distance in the dark. The way to decide your needs is to anticipate your riding preferences and is why most ordinary flashlights make poor bike lights. In many cases you might actually need two or more different lights. But I’ll get there in a moment. For higher speed road riding, a longer reach is important since you could easily out-ride your light. Not that you are spinning your gears at 186,000 miles per second, but rather that your reaction time is slower than your visual field of view. If a brick wall suddenly appeared in your headlight, could you stop in time?
In mountain biking, there are two important changes that require more beam spread, namely the twists and turns of the trail, and the ups and downs of the trail surface. Roads don’t usually have large sudden drops. Trails do all day long. And of course all night long. If you can see ahead but not down, you will quickly get a closeup view of the trail when your face hits the dirt.
The non-linear aspect of trails limits the usefulness of a long beam reach since your light is most often not pointing where you will be going. It is pointing off to the left, then the right, then the left etc. as you navigate the great outdoors. Instead, you need a reasonable beam spread to ignite the reaction time area in front of you.
Pedal Portable Power
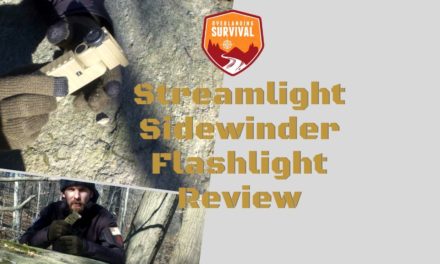
Electrical power is the next big consideration. LED lighting is powered by a battery which can be onboard the light, or tethered to the light with a cable. Tethering is done to provide a larger (both voltage and capacity) beyond what you want to strap to your handlebars. It is not as common now that we have massively efficient batteries and power-sipping LEDs. Basically you can match your intended use with light run time. For minimalist commuters who might need a light to warn cars of their presence, the tiny bike light serves a good purpose. But for those of us using our lights hard and to safely move about at night both on and off-road, a full-featured powerhouse such as the Olight RN 1500 is essential. Runtime must exceed ride time. And when on full blast, a high capacity battery is necessary. Due to that fact, a rechargeable system is generally a must unless there is some reason to have replaceable (disposable) batteries. And with recharging the battery pack, I see no use for that anymore either.
Finally there is the feature set of the light. For me, I like fairly simple flashlights avoiding strobes and SOS options. Not so with bike lights. The fast pulsing of a strobe bike light is more effective in the day and dusk than a steady light that is quickly ignored by a driver’s visual system. Blinking lights demand attention. There are also power settings for light brightness. This is not just for battery management as in lower output, longer battery life, but also to match the conditions for your demands. While a 10,000 lumen light might sound wonderful for a bike light, it will be way too bright for oncoming traffic, and blinding when it hits close or reflective surfaces like sighs, which in turn mess up any night vision you may have developed in the previous few minutes.
A standard car headlight using a traditional halogen bulb fires out about 1500 lumens per light. Older designs are far less, some down to 700 lumens. And modern headlights of LED designs, ARC, Xenon, and even LED Lasers can blast out light well into the five figures, but most hover around 2000-5000 lumens. That quality of photons firing out the front end requires a huge amount of power, and are dangerously bright in many conditions. Yes, things can be too bright. But at 75mph, it’s nice to see a half mile ahead.
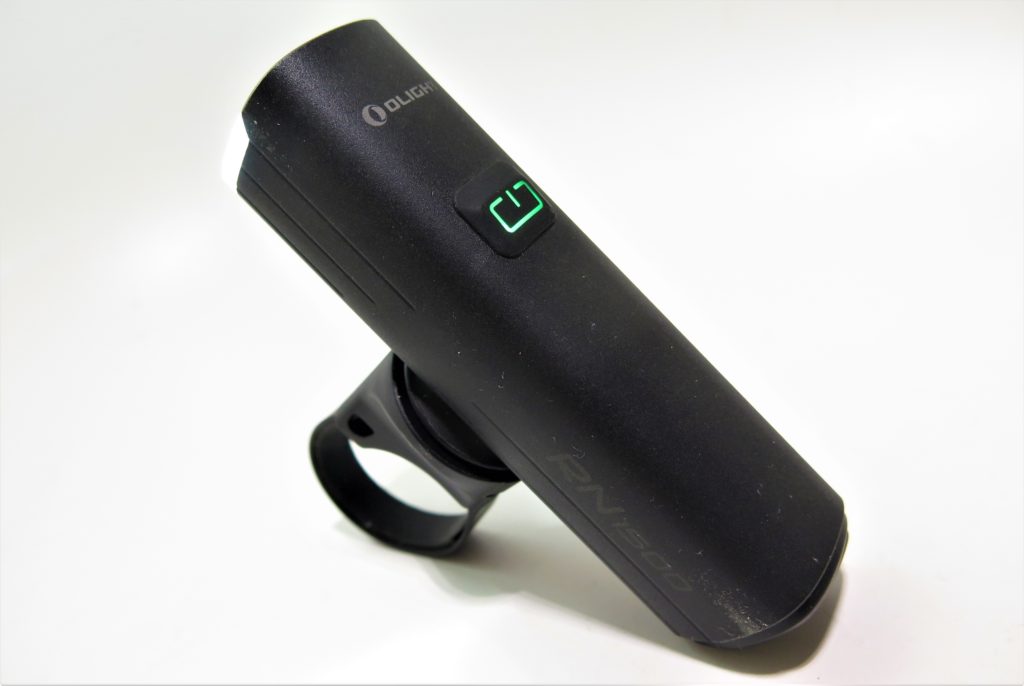
The Olight RN 1500
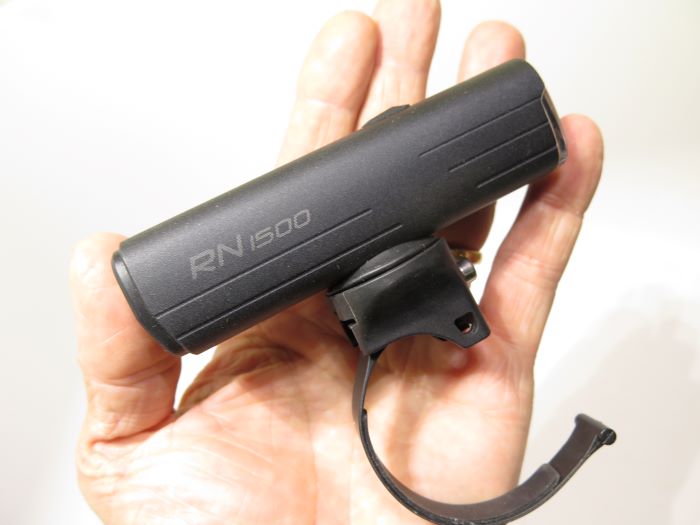
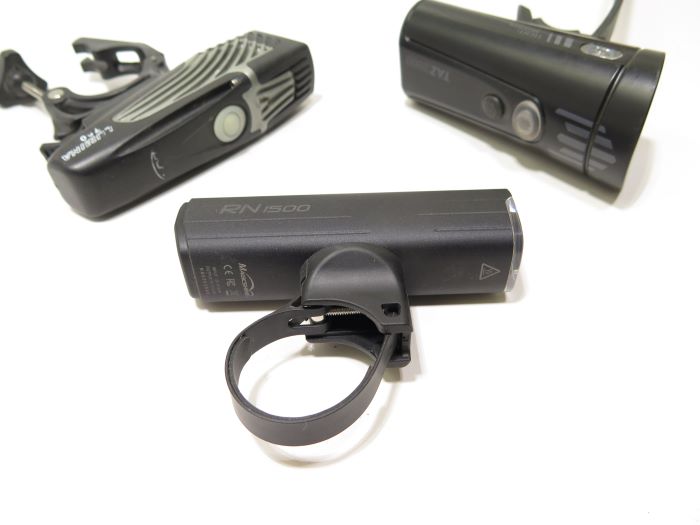
So let’s talk specifics. The Olight RN 1500 is a 1500 lumen light designed for bicycle use. Unlike a flashlight, there are some features of this light that make it especially effective for handlebar lighting. It has a runtime of over 12 hours on its lowest steady output setting meaning unless bike packing the Arctic in December, you will have plenty of light to make it through the night. You can blast the full 1500 lumens, or dial it back to half that, or even half that again with two lower settings of 750 lumens or 300 lumens, both plenty of light for many uses. You get a little over an hour and a half of full blast, and four hours of runtime at the midrange setting. Two flashing settings are available as well, both spin up to 750 lumens and last for 10 or more hours.
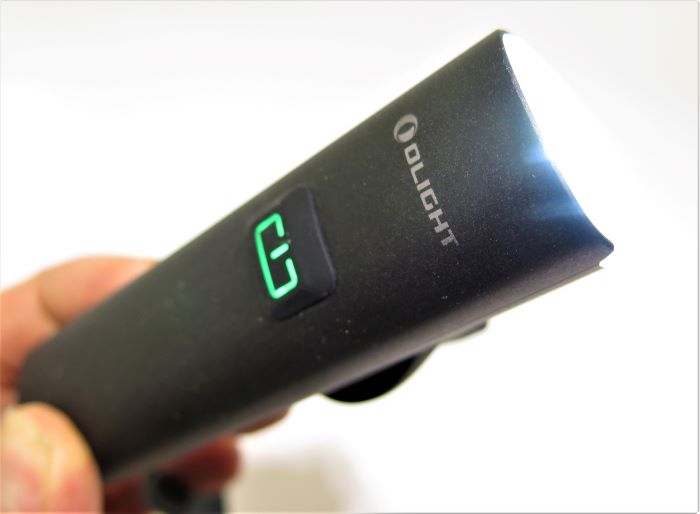
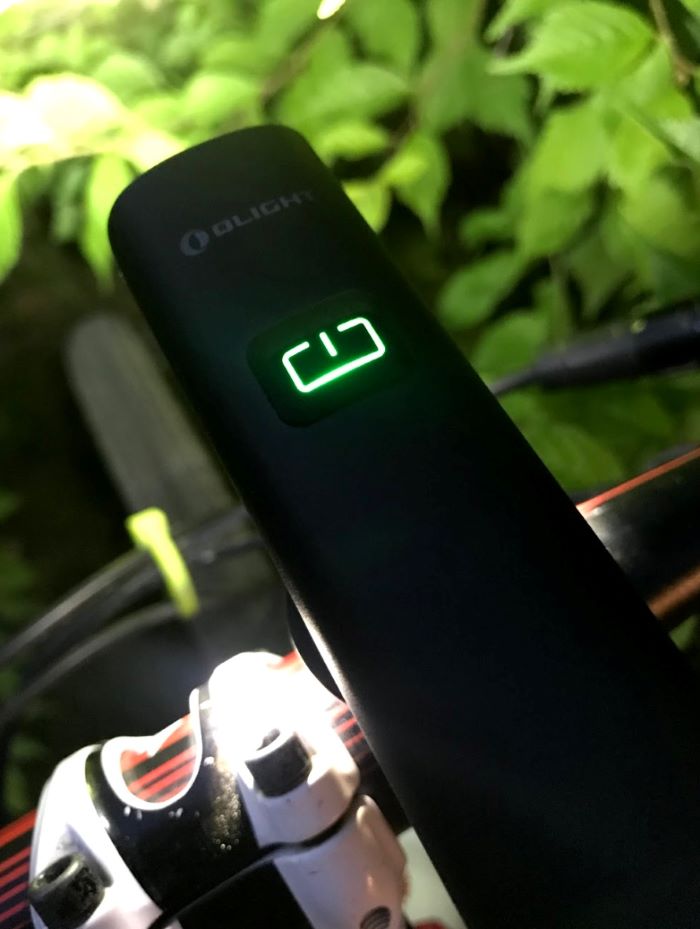
The ingress protection is rated to IPX7 translating in English to either a lot, or plenty. The power button also has a color indication of battery life left. Two more notable features of the Olight RN 1500 include an anti-glare beam light where the top quarter of the lens has horizontal striping that reduces the full-on effects of the light. Since you are not using the light to illuminate the sky, most but not all of the light should hit the ground, but some goes straight forward. It is that light that can cause irritation to oncoming people whether in a car, riding bikes or on foot.
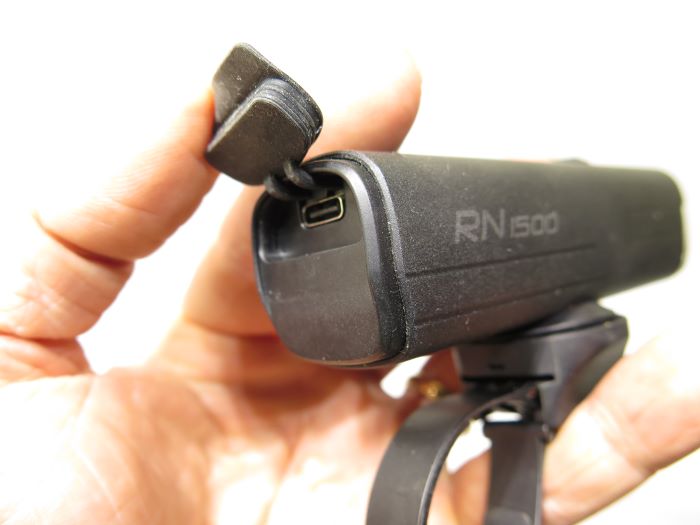
And the next feature is that with all that onboard power from the 5000mAh 21700 battery, the smart folks at Olight allow you to use the Olight RN 1500 to charge your phone or camera as well. Just plug your charging cable into the Olight RN 1500 and the photons will flow out.
Handlebar Grips
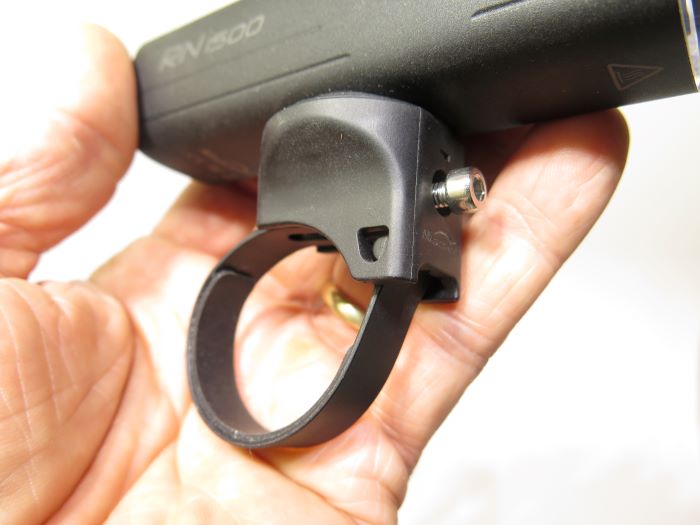
The Olight RN 1500 attaches to the handlebars using one of the three included straps based on bar diameter. The system is rubberized to prevent slipping, and tightened with an included three millimeter hex wrench. The light itself can be removed from the mount with a quick twist to the right or left which would be my only concern. The elongated rectangle of the Olight RN 1500 provides plenty of lever arm to twist the light around its center releasing it from the handlebar mounting platform. So when bikes are tossed into a truck, it would be easy to knock off the light. On the good side, if you crash, the light will likely also dismount the bike on its own rather than requiring the momentum of the crash to concentrate on the light breaking it forever free from its binds.
Also read: Olight Perun 2 Headlamp Review: Is Too Much JUST RIGHT?
Additional mounting options are available including a connector to leverage the GoPro mounting ecosystem. Out of the box, the positioning of the mounting placement on the Olight RN 1500 balances the light effectively meaning vertical blows from trail compressions won’t automatically spin the light towards the moon or the earth.
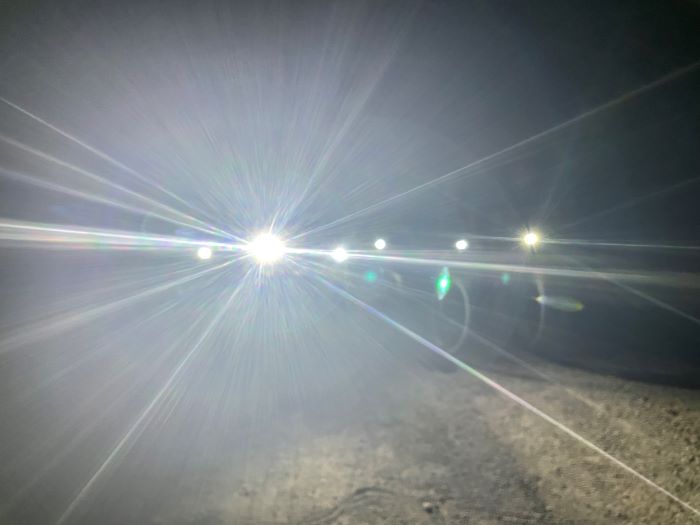
Riding at night under artificial illumination presents several challenges including the direction of light. A handlebar mounted light only points the way the front wheel is pointed. If going into a corner, the wheel is not pointed in the direction you will be going. So that can be a blind spot. The spill of a light can remedy much of that situation, but spill comes at the cost of overall illumination forward. Like a garden hose attachment, you can spray wide or spray far, but not both. So instead you choose where and how much given the finite amount of light available. The Olight RN 1500 provides an effective and appropriate combination of lighting with a smooth, nearly seamless transition between forward directional spot lighting, and clean wide area lighting. Without the right combination, it is often necessary to supplement your bar light with a headlamp mounted to your helmet. This allows for on-demand directional casting of the light. But riding with a headlamp alone creates the exact same challenge, just in reverse. You glance sideways into the turn (or anywhere else) and everything in front of you goes black.
Into the Wild With The Olight RN 1500
Riding the streets at night is a no-brainer for the Olight RN 1500. The real test comes with pushing the light while downhill mountain biking at night. On one test ride, I climbed then descended a local haunt, the MO-Z trail in Missoula, MT. The switchback single track presented few challenges for the light, and even exceeding 20mph in the two-foot wide trough of a trail was about 80% the same as daylight riding. The lights spill was wide enough to set up your line, and the spot was far enough to clearly see what was ahead within stopping distance. The other five riders with me had various lights with the second brightest only half of my Olight RN 1500. It was quite noticeable.
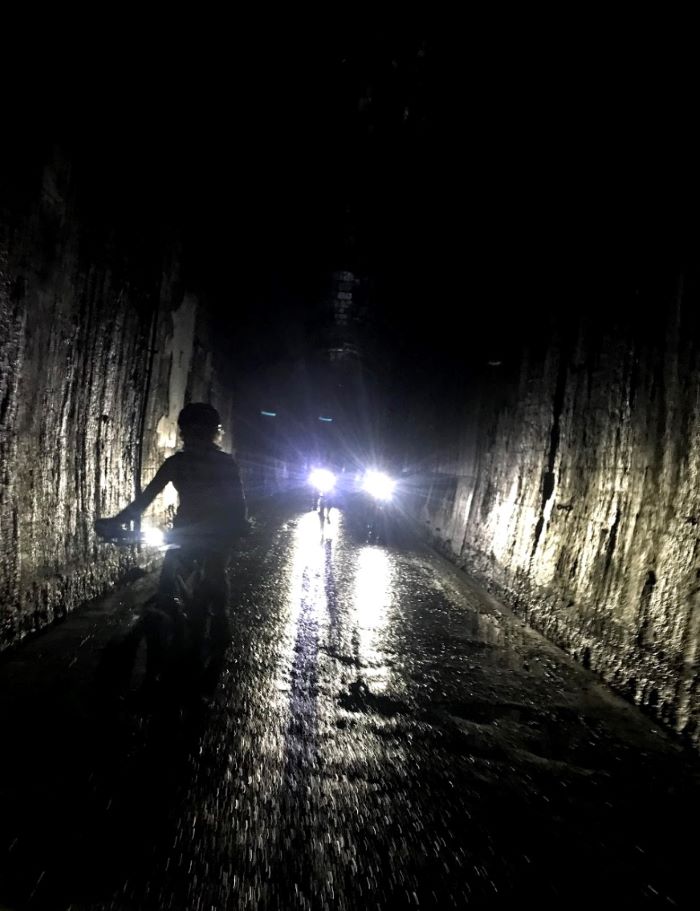
The next test was a rail bed ride down the famous Hiawatha Trail that straddles the Montana-Idaho border. This curated ride includes a 1.66 mile long tunnel. Yes, that’s an 8770 foot long tunnel with no external lighting, windows, vents, or any daylight except from the light at the end of the tunnel. And since that tunnel curves, the proverbial light does not appear anywhere near the middle. Needless to say, it’s dark in there. But it also provided a serious test platform for viewing light output in about as close to a laboratory as possible in the wild.
Also Read: Garmin Foretrex 601 Overlanding GPS review
The usual way you ride the Hiawatha Trail is to start on the Montana side, ride through the tunnel, and then continue on through and over the remaining nine more tunnels and seven trestles, the highest at 230 feet above the forest floor and 850 feet long. Reaching the end of the 14.4 mile ride, a shuttle is waiting (or more likely you wait for a shuttle) to take you back up to a spot just after the first and longest tunnel. What that means is to get back to the parking lot, you need to ride through the longest tunnel again. Meaning you need another 10-20 minutes of full light. This is not toodeling through the local neighborhood. This is in a confined space 1.6 miles long and 100% devoid of additional or external lighting.
The Olight RN 1500 was easily the brightest light in the tunnel second only to the TAZ200 light mounted on my wife’s bike. The TAZ200 is about three times the price of the Olight RN 1500 and only a third brighter. But luckily I could tell a difference after spending all that money on the TAZ.
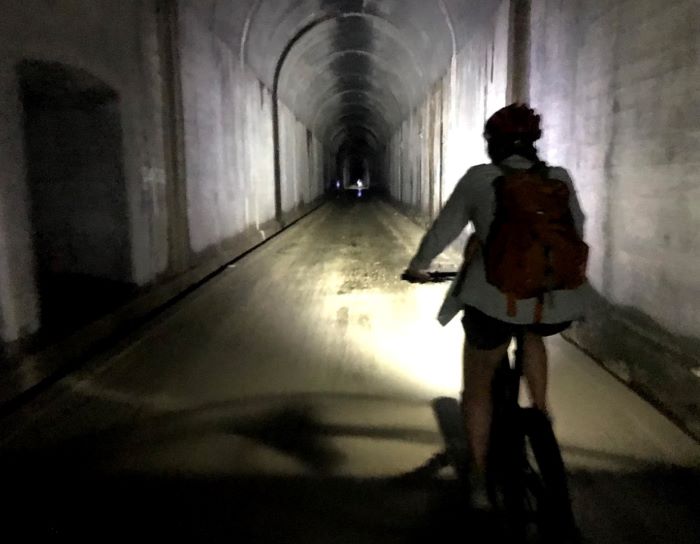
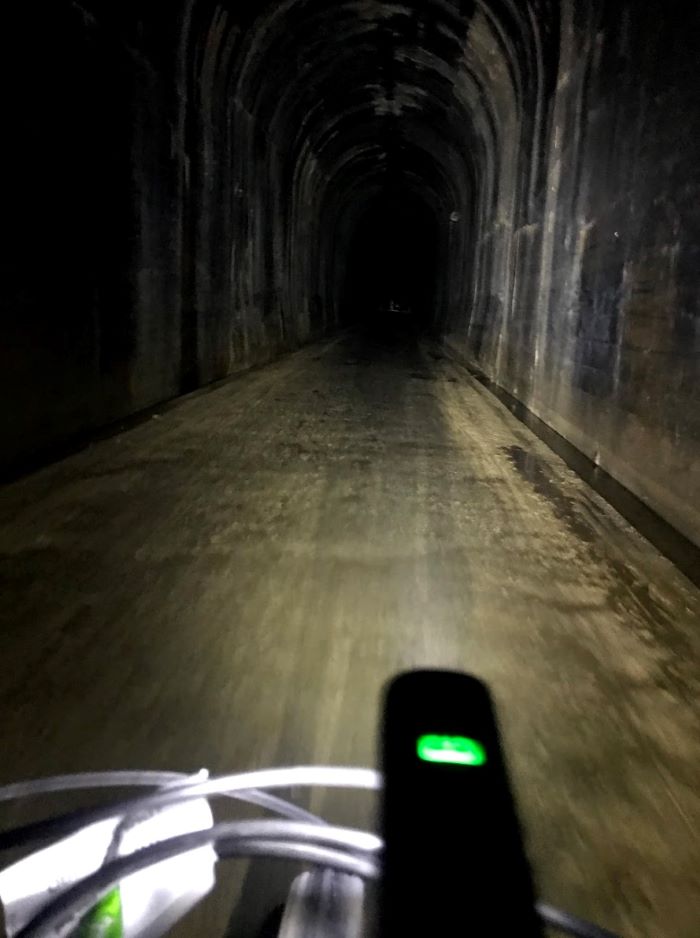
The Olight RN 1500 blasted enough light to brighten the entire tunnel, roof and all out a few dozen yards, then the counterweighted focus lit up the trail beyond what I could see clearly through the bit of dust and water dripping from the ceiling. There was no way I could outride the light’s reach.
The glowing green battery indicator is a welcome companion given the serious need of light on this ride. While riding slow enough to avoid a mud stripe up the back, a tunnel time of 15 to 20 minutes is quite reasonable. Those who rode fast were covered with a sticky, wet, grey muddy souvenir covering their bikes, backs, helmets and hair.
The Olight RN 1500 was easy to adjust on the fly, and cycled through the most important brightness settings with just a click of the glowing green button. The flashing choices of the light were behind additional commands which is helpful to avoid turning a damp dark tourist attraction into a rave.
I know bike lights are not as sexy as tactical torches or EDC flashlights, but literally every time you need one, your life might be on the line. So choose wisely.

