
Overlanding has a significant degree of self reliance built in. In fact that is one of its most desirable qualities. And thus it follows that one must take responsibility for what one is about to do. The first metaphorical obstacle to those new to overlanding is recovery gear. Basically, recovery gear is any additional equipment that you can use to assist in getting your vehicle moving again. That said, there is often a blurry line between the tool kit and the recovery kit. While there is obvious overlap between the kits, for this introduction I will focus on those items that are more specific to moving the vehicle. I will also assume that the vehicle is stuck somehow due to loss of traction to any of many causes.
Overland Recovery Gear List
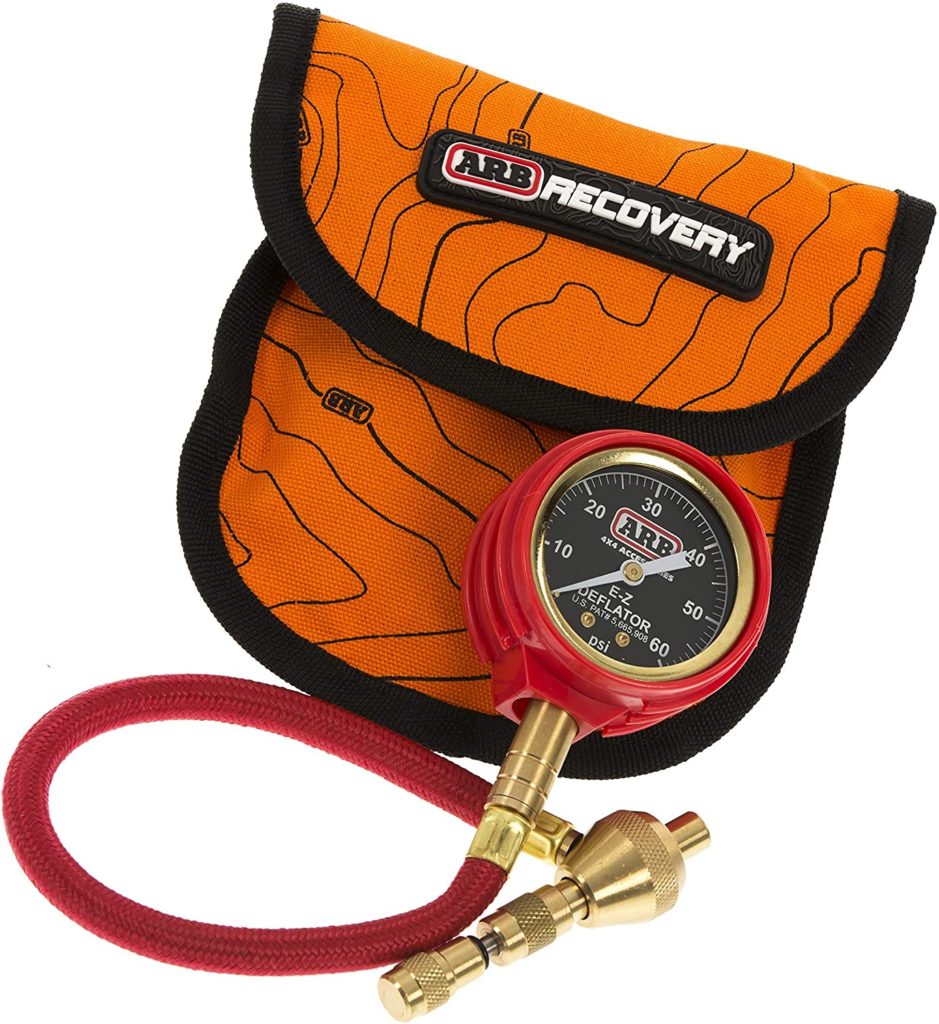
Air Down the tires. While this is a process, there are tools to assist with airing down that many find essential. As a point of philosophy here, you might need to air down because you are stuck, however, had air downing been easier and faster, you may have done it ahead of time and avoided getting stuck in the first place. While you could just use a small rock or stick to push in the pin on the Schrader valves of your tires, you might find that it takes quite a while to notice a difference. You could unscrew the valve core allowing a faster release, and many carry just such a tool for that, but you might also lose or bend your valve core so be careful. But the best solution I’ve found is the ARB E-Z Deflator. This tool allows for fast and accurate deflating. A special attachment screws onto the valve stem and then a built-in valve core tool unscrews the core but keeps it safe and ready to screw back in. Then a deflation button lets the air out while you watch the gauge. When you’re done, just screw the valve core back in, remove the tool, replace the valve cap and move onto the next wheel. Of course you will need a plan for how to air-up your tires later.
Shovel: The humble spade is the most used recovery tool in the kit by far. It often is the only one needed and rarely is there a recovery where the shovel is not actively involved. Shovels range from tiny folding tools through full-length full-sized work shovels. I prefer the latter. While World War II trenching shovels are popular because of their small size, they are not the most efficient or sturdy for the business of overlanding. And while it might seem a good idea to shave weight and size by getting a short-handled shovel, any serious digging will teach you exactly why we have long handled shovels. Plus often the stuff in need of shoveling is under the vehicle and so a longer handle means you don’t have to crawl under as far. I chose the Fiskers Long-handled Digging Shovel. It’s a beast with a long metal handle. I would choose something else for gardening, but the solidity and durability of this particular Fiskars shovel is worth it. I’ve had wooden handled shovels break, and anything that rides around on the outside of your vehicle will age quickly. And what’s better than one shovel? Two shovels.
Gloves. A good set of leather work gloves that actually fit is important for both health and safety. You don’t want to tear up your $200 Arcteryx Gore-Tex ski gloves when digging your 4×4 out of a snowbank.
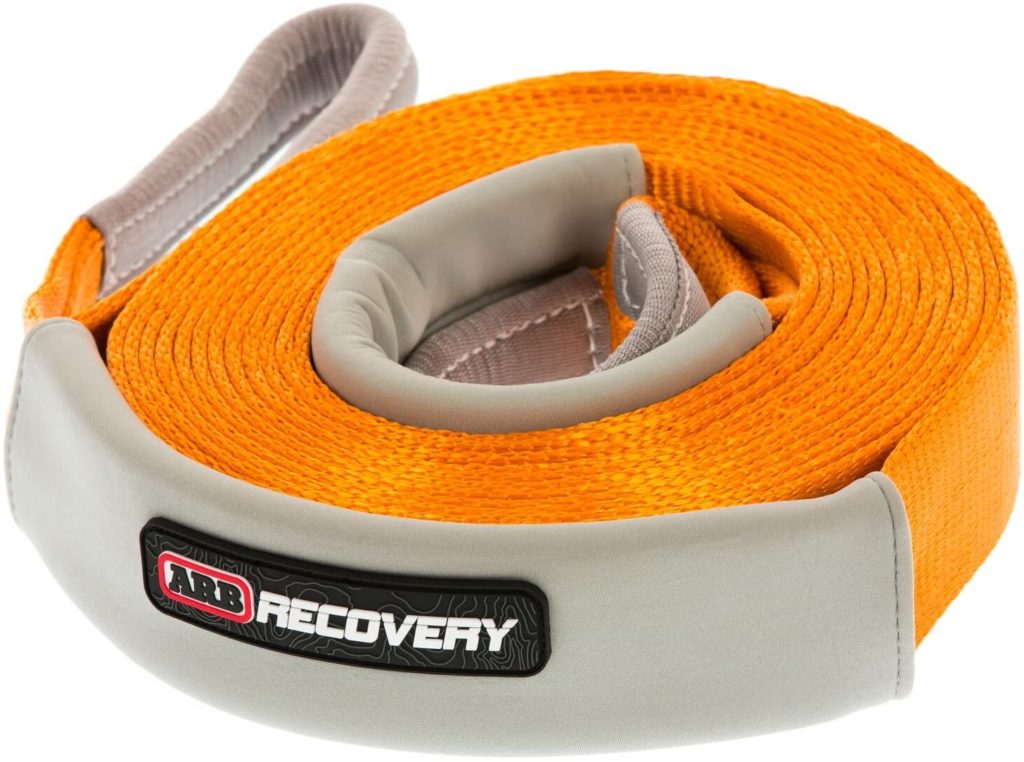
Snatch Strap. There is often another vehicle around to assist in the recovery. So what you need is a way to connect the two vehicles together. There are dynamic or snatch straps that stretch. This is what you want. The other kind of strap is a static or tow strap and it does not stretch. The snatch strap gives added energy to the recovery by allowing the pulling vehicle to be moving safely when the line goes taught. Using a tow strap this way is like hitting your vehicle with a giant hammer. Snatch straps cost more than tow straps, and are not as common on the auto parts store shelf. I recommend the orange ARB Snatch Strap. There are bigger options if you are running a larger truck or RV, but for my needs, the 2 ⅜” strap works. If you go too large, the snatching part of the snatch strap is not fully used because your vehicle cannot easily load the strap with potential energy.
Shackles. If you have a strap, you are going to need a way to attach it. Shackles can be either horseshoe-shaped metal couplers or a loop of nylon rope with a ball on one end that fits into a hole on the other end. These latter so-called soft shackles are excellent, but need care if used over metal edges. They are also a little hard on the wallet. The old standby metal shackles are sized by strength. While you might want the big ones, know they won’t fit into many attachment points especially on smaller vehicles. Most of us carry an assortment of shackles. And if you don’t have a good place on your vehicle to attach a shackle, then look into fixing that as well with aftermarket recovery points. Some are as simple as a plug into your trailer hitch receiver, while others require drilling into your vehicle’s frame.
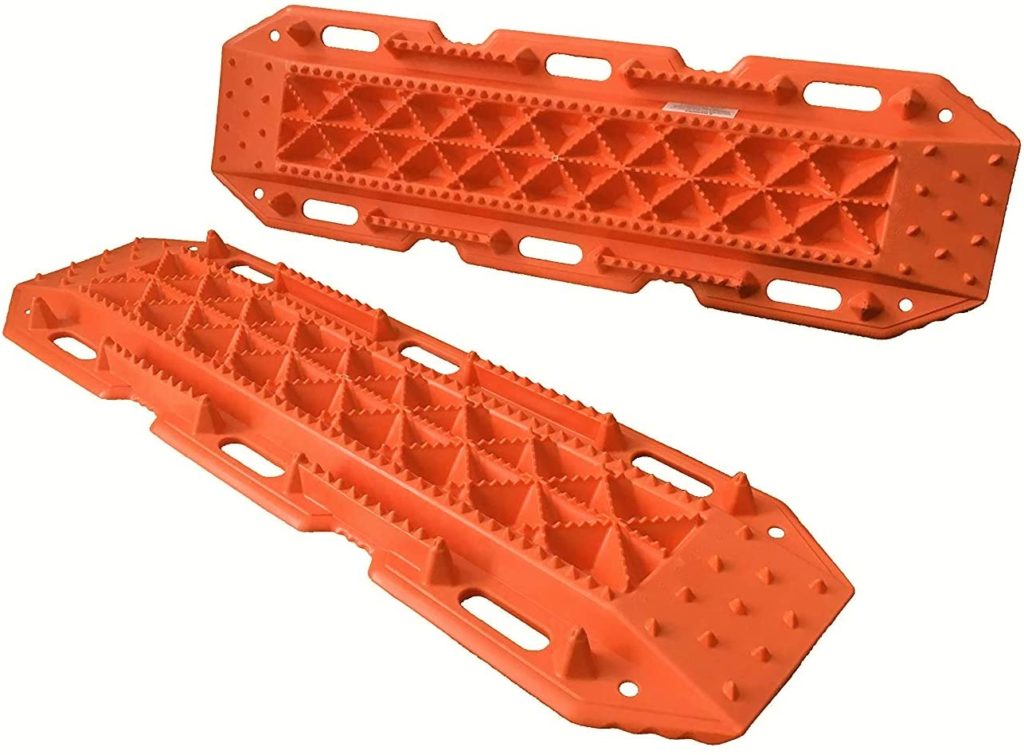
Traction Pads. The rectangular traction pads are a versatile recovery tool that are by far the simplest to use of all the recovery devices. By placing them tightly against the drive tires, they provide a more solid platform with grip that can give you the momentum to unstick yourself. They also work as a jack stand, a backboard, a shovel, a bridge over a hole or crack, a ramp, and a leveling device for camping. Prices vary, but the good ones are really good, and the bad ones are really bad. Since traction pads will get used, I suggest putting some money into good ones. For heavy use, get the real MaxTrax pads. For lighter or occasional use, the Maxsa Innovations will work.
Jack. Ahh, the jack. While the red Hi-Lift jack is often worn like a badge of courage bolted onto the hood, roof or tailgate of a vehicle, there is no more misunderstood or dangerous piece of recovery gear on the planet in my opinion than the Hi-Lift jack. First of all, the Hi-Lift jack or farm jack will not fit under your vehicle so you will need a place to connect it. Bumpers are popular, but you must have a solid metal point or the jack will just rip off whatever you connected it to. Additionally, if you lift a vehicle by its frame, you will also have to lift it high enough to take up the slack in the suspension in order to get a wheel off the ground which might mean raising the vehicle frame a foot or more. And lowering a raised vehicle with Hi-Lift could put you in the hospital if you don’t know what you’re doing. Care must be taken not to smash your hands or face with the jack handle. On the good side, if you need a Hi-Lift jack, you really need one. However, the humble bottle jack is often plenty for most needs. With a little practice and creative engineering, you can do many things with the bottle jack. And you can even supplement the bottle jack that came with your vehicle with a larger one. That way you can tag-team them if you have to raise your vehicle higher than normal.
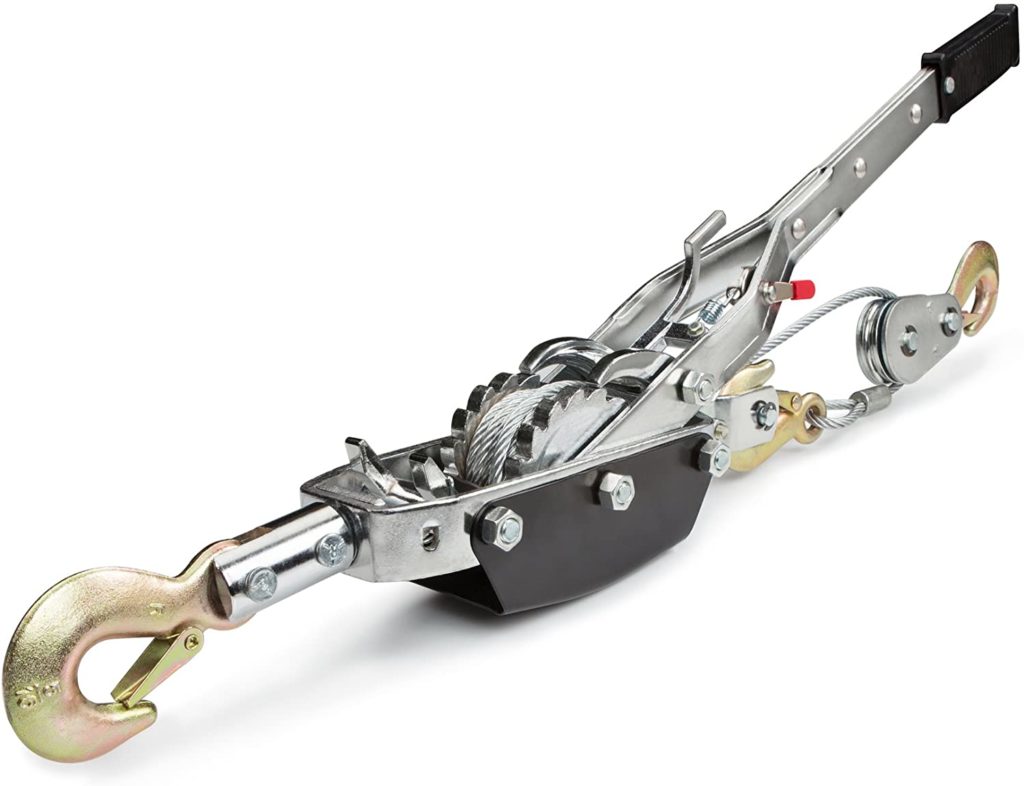
Winch. There is an almost supernatural calling to mount a winch on the front of your overlanding vehicle. While the electric winch is an essential piece of recovery kit for some situations, it is often rarely used although costing the most money. Plus it ages requiring maintenance and upkeep. And with the winch often comes a new front bumper. So dollars and pounds can really add up fast. A common alternative for the bumper-mounted winch is the ratcheting come-along or “power puller.” This is basically a hand winch with a cable and maybe a pulley or two. It is much less expensive than an electric winch, and can easily be moved about as needed. Of course the downside is that you need to crank the thing manually rather than push a button or flip a switch. And as a winch, all the same safety and training is required.
Tree Savers. These are heavy duty straps that can wrap around trees or other objects to provide a solid and safer (for you and the tree) attachment for your winch. Some people even use them to wrap axles for when there are no attachment points available on a vehicle. Be careful or you might do some serious damage, but sometimes there is no choice. And there are more specific straps for just such a need.
Snatch Block. A snatch block is like a super strong metal pulley that allows for both redirection of force, and mechanical advantage depending on how it’s used. There is a variation on the classic snatch block pulley design where just a pulley wheel is placed on a soft shackle. It’s a great system with some advantages, but price is not one of them. Also you must match your cable or rope with your snatch block or you could damage your equipment assuming you can even get it to work.
As expected, there is more than just the listed recovery gear above. But it’s a good start, but stay tuned for more.